How to install an FTP server on a dedicated server running Debian 11?
Before installing the FTP server we should check that all currently installed software packages are up to date, to do this in the console (CLI) type:
sudo apt update
The system will then check whether the software repositories have been updated in relation to the packages currently installed. If the most recent versions of the software are currently installed on the system, you will see a message stating that no updates are possible. Otherwise, you will be informed of the number of packages available for update.
If none of the currently installed package versions are required for the use of other software (sometimes users use software that requires a specific package version), we can perform an update of the currently installed packages with the following command:
sudo apt upgrade
After executing the command, you will be informed which packages will be updated and which, if any, will be removed; to allow the update, select one of the options (yes/no):
Y/n
In our case, it will be Y or y, the entered option is then confirmed with the Enter key.
Once the currently installed packages have been correctly updated, we can move on to installing the necessary server components FTP.
sudo apt install vsftpd
sudo apt install ufw
To do this, the following commands are executed in the console window (CLI):
sudo ufw allow ssh
sudo ufw allow 20,21,990/tcp
sudo ufw allow 40000:50000/tcp
sudo ufw status

sudo ufw enable

sudo cp /etc/vsftpd.conf /etc/vsftpd.conf.orig
sudo rm -rf /etc/vsftpd.conf
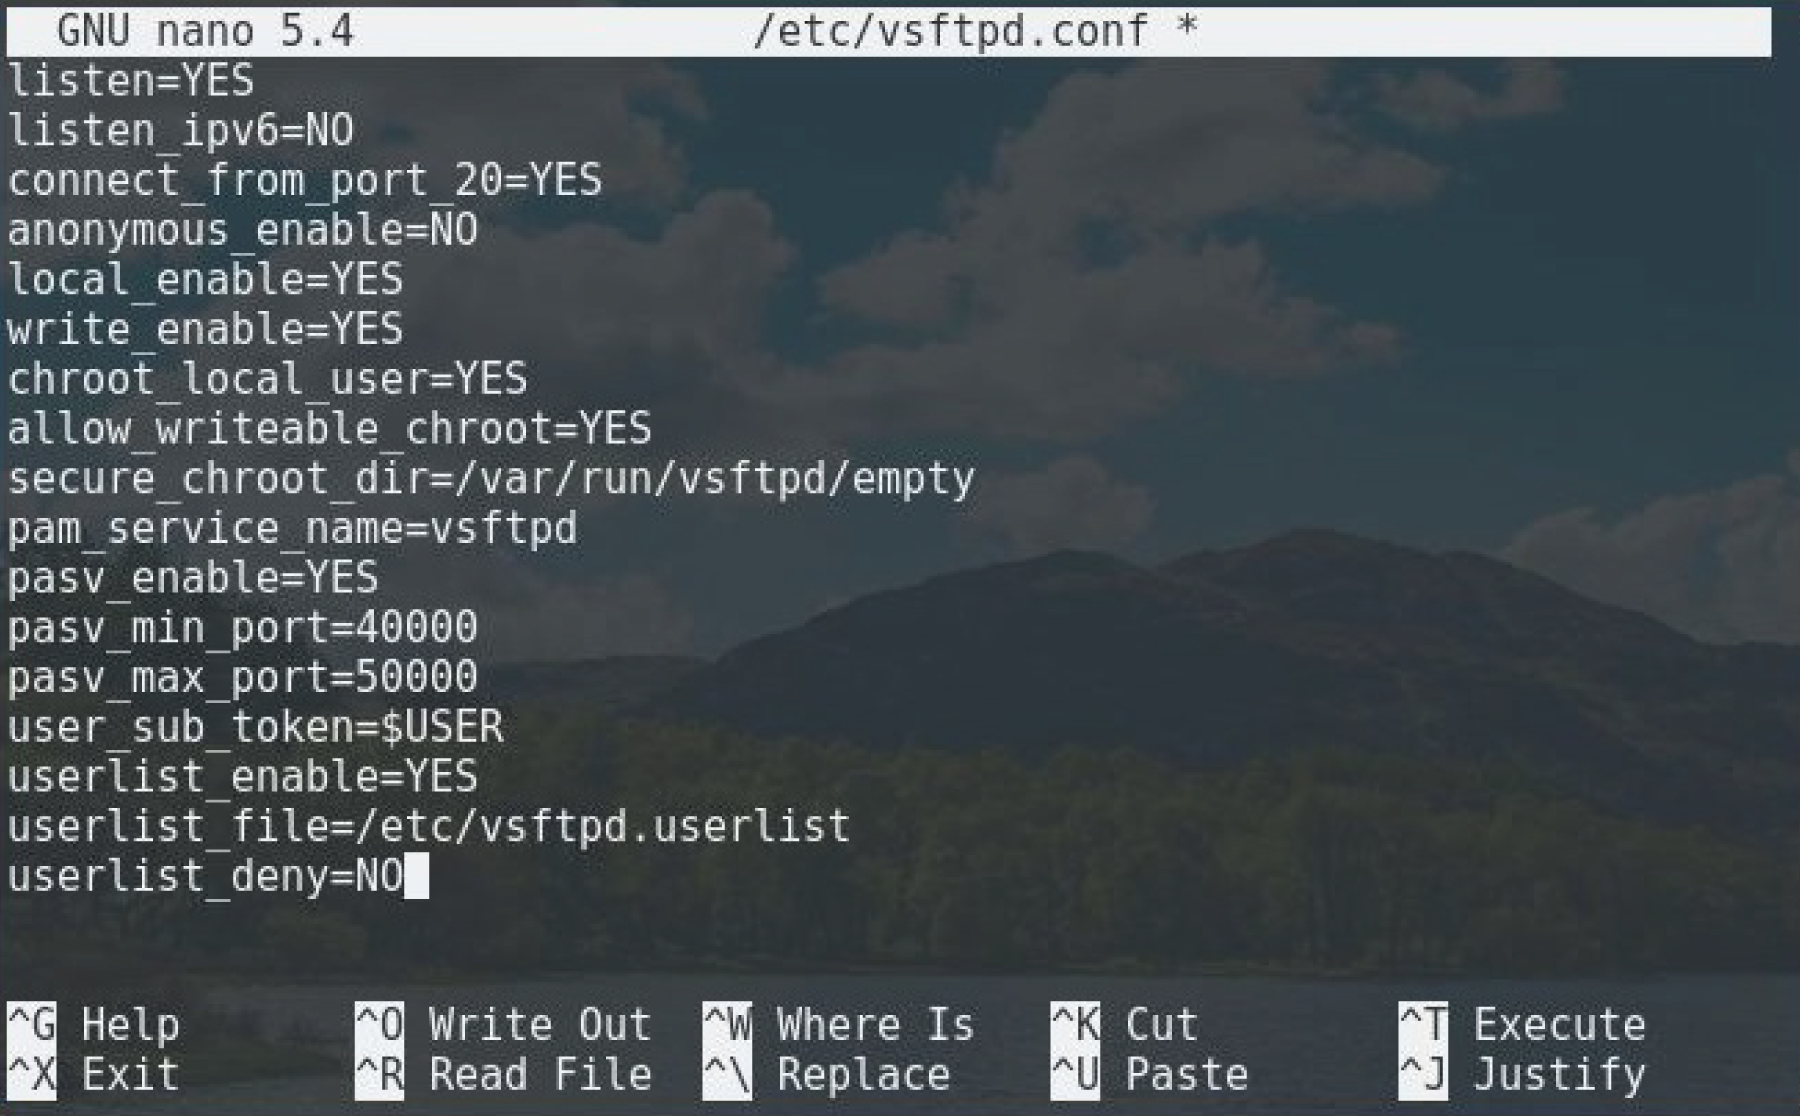
sudo nano /etc/vsftpd.conf
listen=YES
listen_ipv6=NO
connect_from_port_20=YES
anonymous_enable=NO
local_enable=YES
write_enable=YES
chroot_local_user=YES
allow_writeable_chroot=YES
secure_chroot_dir=/var/run/vsftpd/empty
pam_service_name=vsftpd
pasv_enable=YES
pasv_min_port=40000
pasv_max_port=50000
user_sub_token=$USER
userlist_enable=YES
userlist_file=/etc/vsftpd.userlist
userlist_deny=NO
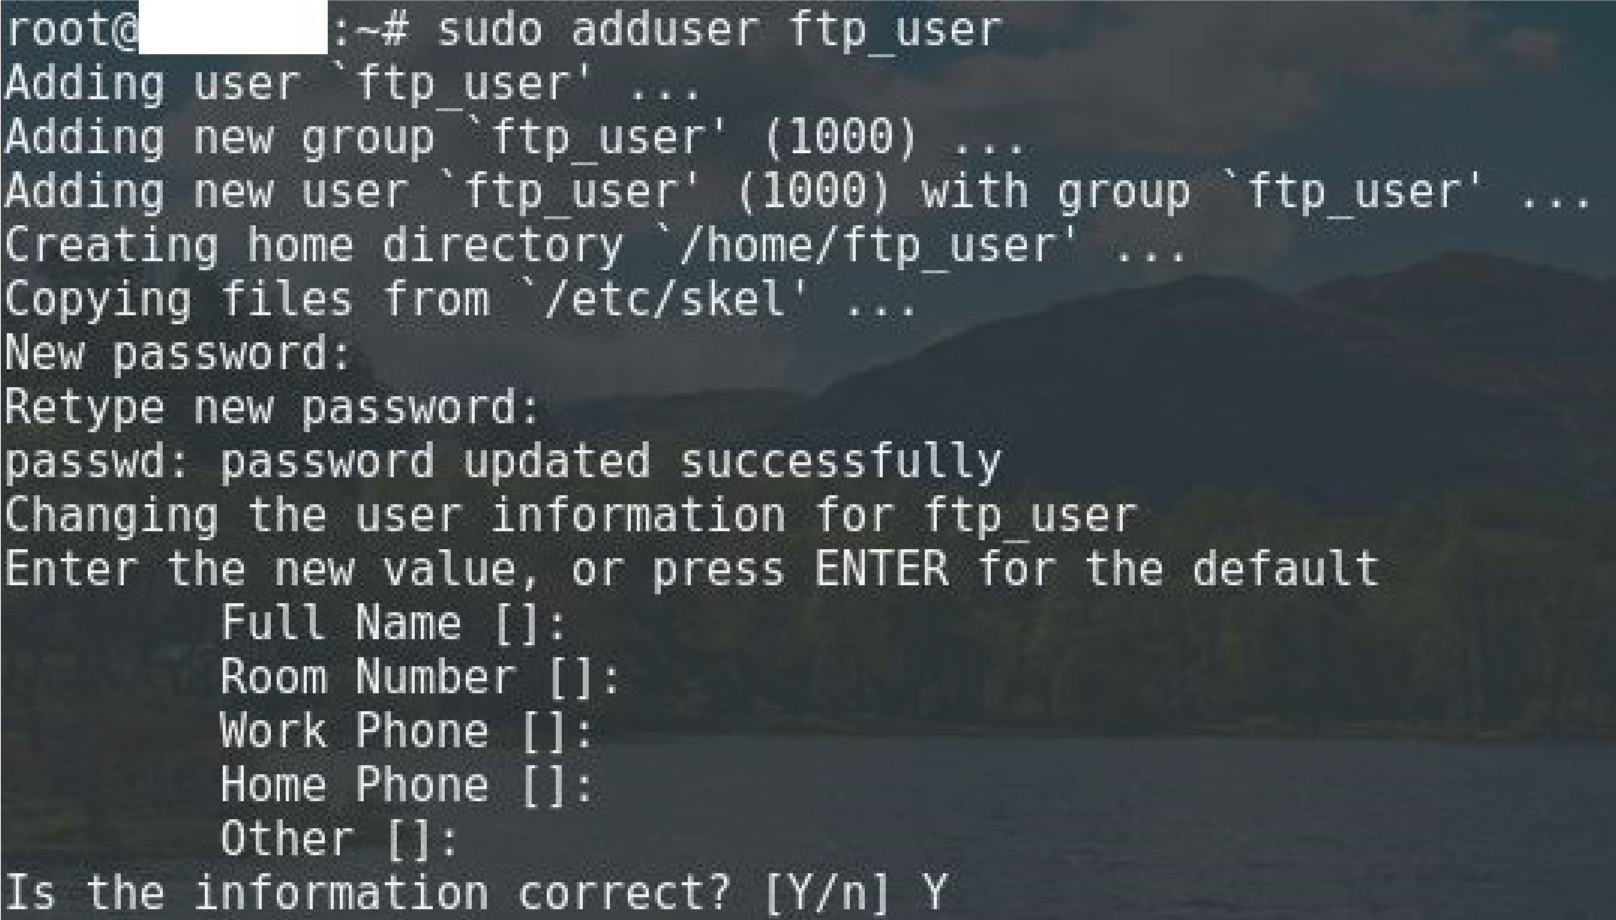
sudo adduser ftp_user
echo "ftp_user" | sudo tee -a /etc/vsftpd.userlist
sudo systemctl restart vsftpd
sudo systemctl enable vsftpd
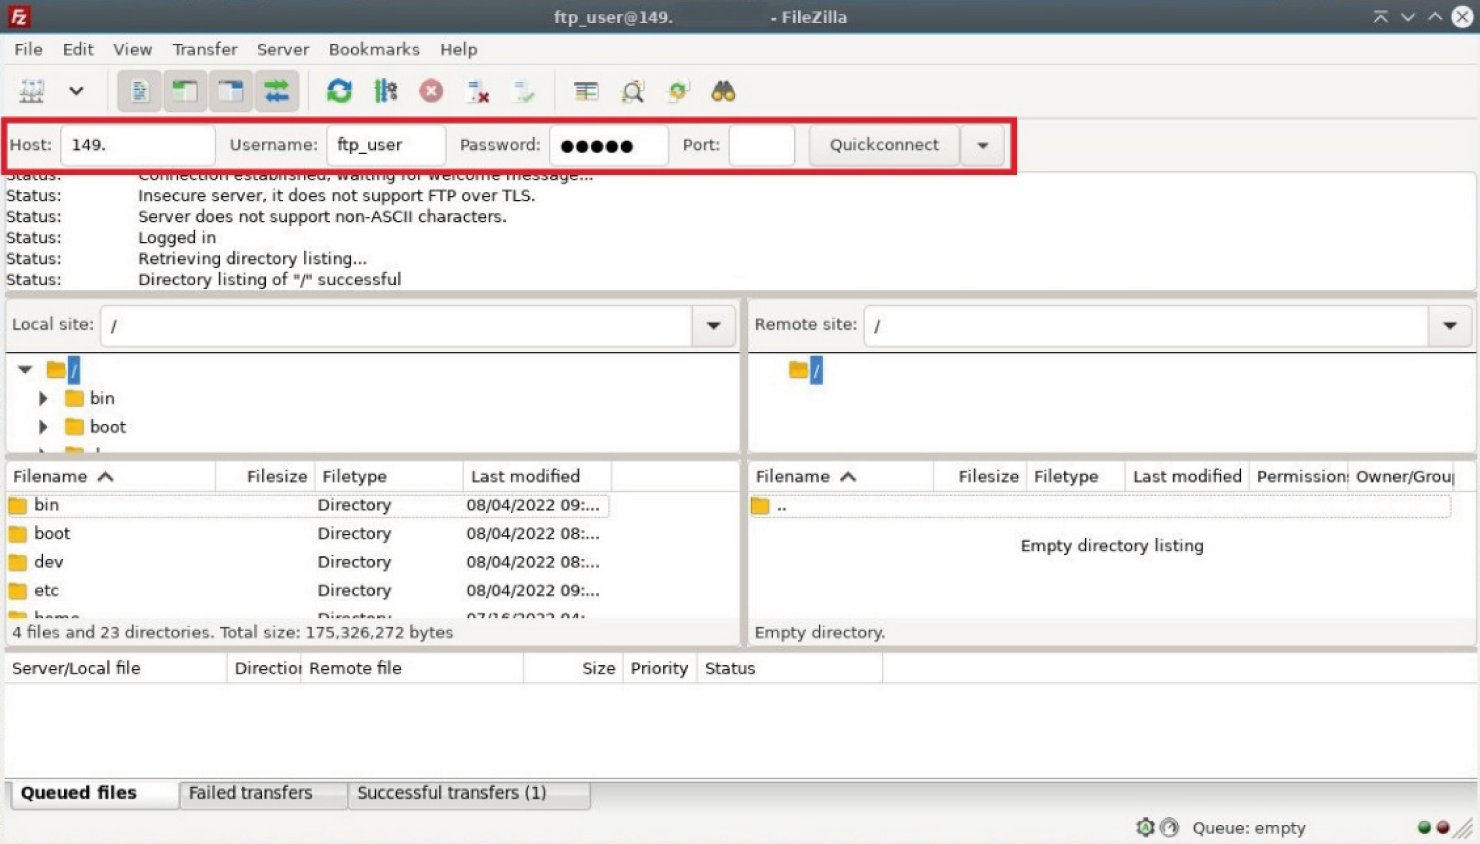
Once all the above steps have been completed correctly, we can move on to connecting to our FTP server. You can use FileZilla, for example, which is available on Windows and Linux. In the FileZilla window, enter the IP address of our server, the name of our FTP user, the password and click on the 'Quickconnect' button.
Done! You have installed the FTP server.